
全記事からの続きの手順メモ。途中でブレーカー落ちたり、放置中に強制終了してたりで何度もやり直しとなり遅くなった(ーー;)休日おでかけ続きだったし。
口をあけたのはこの辺を特に直したかったから。
[peg-image src=”https://lh3.googleusercontent.com/-dalSAqnpjlw/WobG28AMShI/AAAAAAAA6SI/JjYERemrqkclFdn7AL-2uzWHCMMtpcCfgCCoYBhgL/s144-o/dz-seam.jpg” href=”https://picasaweb.google.com/109425650485415836391/6519222954477215633#6523119757414910482″ caption=”” type=”image” alt=”dz-seam.jpg” image_size=”1600×1000″ peg_single_image_size=”w600″ ]アップにして作業してると時々余計なとこも選択に入っているのに気づかずこういう悲劇も。まあまたポリペイント適用しなおせば良いんだけど。。。
[peg-image src=”https://lh3.googleusercontent.com/-YXnpRcI8pWo/WobG25MLCII/AAAAAAAA6SI/Ku4IGxy1PVUHWnVC-Bv8VCttioVevRDsACCoYBhgL/s144-o/dz-texmiss.jpg” href=”https://picasaweb.google.com/109425650485415836391/6519222954477215633#6523119756659853442″ caption=”” type=”image” alt=”dz-texmiss.jpg” image_size=”883×1000″ peg_single_image_size=”w400″ ]とりあえず全身にポリペイントを適用。歯のみ特に修正するほどでもないので放置。
[peg-image src=”https://lh3.googleusercontent.com/-abSAycHfnj0/WobG24F5bHI/AAAAAAAA6SE/IucENakD6P4QPDYUXNJtAUmDCt2j-Y52QCCoYBhgL/s144-o/dz-paimted.jpg” href=”https://picasaweb.google.com/109425650485415836391/6519222954477215633#6523119756365098098″ caption=”” type=”image” alt=”dz-paimted.jpg” image_size=”1500×1641″ peg_single_image_size=”w400″ ]ここまでやってやり直しになったこともあるので一旦セーブする。
現在の状態を丸ごと保存するにはZPR形式で。
File>Save As でプロジェクトとして保存されます。ファイルダブルクリックで前回作業したモデルも読み込まれた状態でZbrushが起動します。
もしくは履歴や付随する情報を削除して単体のツールとして保存という手もある。オブジェクトを選択したした状態で右のToolタブからSave As。
間違えて以前DocumentタブからSave Asして落としたら、ZBR形式となって再現できず全てやり直しとなった(ブラシ保存?)ので注意w
[peg-image src=”https://lh3.googleusercontent.com/-UZqSJoxjz6A/WobG22qnbSI/AAAAAAAA6SI/GW5Qp5xVMWcQBrlbNohRe37jDIQbTmuagCCoYBhgL/s144-o/dz-save2.png” href=”https://picasaweb.google.com/109425650485415836391/6519222954477215633#6523119755982236962″ caption=”” type=”image” alt=”dz-save2.png” image_size=”840×463″ peg_single_image_size=”w500″ ]6
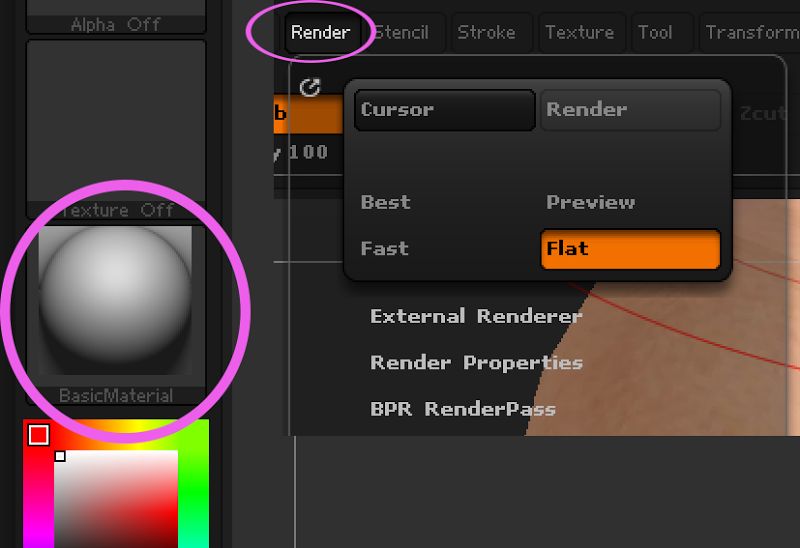
モデル上にペイントするには、ビューポートの上のブラシ設定でZaddをオフにする必要があります。(dispやバンプマップも必要な場合を除き)
またRGBがオンで、MRGBをオフの状態にする。
シームレスな転写された状態のため、直接3Dペイントするのと同じくパーツをまたいでペイントすることができる。
ここからは過去記事を参考にDocumentのメニュー番下の方にある「ZAppLink」でPhotoshopに送り込んで修正開始。

ZAppLinkがうまく起動しない場合は、対象となるPhotoshopへのパスがおかしくなっていることがある。
「Set Target App」で自分が使いたいバージョンのPhotosho本体があるパスを指定。
なのだが今回は「マルチビューでペイント」というのをやってみた。
a.モデルを回転して正面を向かせる
b.Document>ZAppLink ボタンの下にある 「ZAppLink Properties」を開き「Front」のボタンを押す(同時にBackにも自動的にチェックが入る)
[peg-image src=”https://lh3.googleusercontent.com/-ah23EkWnaek/Woba1uIJILI/AAAAAAAA6Sw/im5NyuP8xMUz_GClMnIFDfZmhNPhxSpRwCCoYBhgL/s144-o/z-multi-proper.png” href=”https://picasaweb.google.com/109425650485415836391/6519222954477215633#6523141726742847666″ caption=”” type=”image” alt=”z-multi-proper.png” image_size=”1500×1078″ peg_single_image_size=”w600″ ]c.モデルを回転して右向きする。回転させながらShiftを押すと90度ずつきれいにまわせる。
d.同じく「ZAppLink Properties」の「Right」のボタンを押す(同時にLeftにも自動的にチェックが入る)
e.モデルを回転して上から見下ろす。
f.同じく「ZAppLink Properties」の「Top」のボタンを押す(同時にBotmにも自動的にチェックが入る)
[peg-image src=”https://lh3.googleusercontent.com/-TQXwlQYFphQ/Woba1u9zKVI/AAAAAAAA6Sw/SvIYnbUy4zEtecdbo6dBwDyG78lPViDiACCoYBhgL/s144-o/z-multi_set.png” href=”https://picasaweb.google.com/109425650485415836391/6519222954477215633#6523141726967900498″ caption=”” type=”image” alt=”z-multi_set.png” image_size=”479×455″ peg_single_image_size=”w600″ ]g.ここまでやったところで「ZAppLink」のボタンを押すと、マルチビューモードになってるという表示が出る。その下はパースペクティブを効かせた状態で出力するかのチェックなので、通常のテクスチャ修正には不要。
[peg-image src=”https://lh3.googleusercontent.com/-UQ8t9mnfmnQ/Woba1j8oCeI/AAAAAAAA6Sw/g4Ayx3hGUeM9vSA4CgCQWiy60735N3q5wCCoYBhgL/s144-o/z-multinotice.jpg” href=”https://picasaweb.google.com/109425650485415836391/6519222954477215633#6523141724010187234″ caption=”” type=”image” alt=”z-multinotice.jpg” image_size=”1000×556″ peg_single_image_size=”w600″ ]h.パラパラパラーっと各カメラ方向からの出力があり、Photoshopでは複数レイヤーが重なってインポートされてるので、修正したいレイヤーごとに表示、非表示で手直しする。終わったらそのまま上書き保存でまとめてシングルの時と同じ手順でZbrushに転送される。
[peg-image src=”https://lh3.googleusercontent.com/-DQ9k9stJLZ4/Woba1oeLFPI/AAAAAAAA6Sw/pyj0dcLVZpA_Pwh-WlPNiz5m4IxpRJbtACCoYBhgL/s144-o/ps-multiimport.jpg” href=”https://picasaweb.google.com/109425650485415836391/6519222954477215633#6523141725224637682″ caption=”” type=”image” alt=”ps-multiimport.jpg” image_size=”1700×1000″ ]7.
テクスチャの作成が完了したら、テクスチャを独自のテンプレートでエクスポートすることが出来ます。
上記4でやったように schift + ctrlで ポリゴングループをクリックして残りを非表示にします。
右のTexture Mapの下部にある「Create」の階層を開きます。
一番上にある「New From Polypaint」をクリックします。
すると表示されるテクスチャ画像が選択した部分だけに変化します。
[peg-image src=”https://lh3.googleusercontent.com/-Vv95o213j-Q/Wo1xlK6FagI/AAAAAAAA6ig/4oW_w0sG4QoXyAchkyYaQVQHr32NOme7gCCoYBhgL/s144-o/z-texexp02.jpg” href=”https://picasaweb.google.com/109425650485415836391/6519222954477215633#6524996318526794242″ caption=”” type=”image” alt=”z-texexp02.jpg” image_size=”1500×772″ peg_single_image_size=”w600″ ]Texture Mapの「Clone Txtr」をクリックすると ビューポートの反対側に複製されます。
[peg-image src=”https://lh3.googleusercontent.com/-K7x14H99gkM/Wo1xlCFdApI/AAAAAAAA6ig/45tFkTiH-B8RNcxKp-e6X1INjCs9l3tfQCCoYBhgL/s144-o/z-texexp03.jpg” href=”https://picasaweb.google.com/109425650485415836391/6519222954477215633#6524996316158558866″ caption=”” type=”image” alt=”z-texexp03.jpg” image_size=”1200×1004″ peg_single_image_size=”w600″ ]サムネイルクリックでテクスチャウィンドウが開くので、一番下にある「Export」ボタンを押す
[peg-image src=”https://lh3.googleusercontent.com/-xMBeQwtF5LU/Wo1xlIs1jgI/AAAAAAAA6ik/WsNy41IQMPcZDmSNLVj2mJudIZIfTUTygCCoYBhgL/s144-o/z-texexp04.jpg” href=”https://picasaweb.google.com/109425650485415836391/6519222954477215633#6524996317934358018″ caption=”” type=”image” alt=”z-texexp04.jpg” image_size=”813×395″ peg_single_image_size=”w600″ ]それをpsd,png,JPGなどの形式でエクスポートできます。
注:テクスチャの解像度は「 UV Map」タブで設定できます。(現行Dazモデルはだいたい 4096 pixl)
8.
Displacement マップとNormalマップを抽出するプロセスはテクスチャと同じですが、各ポリグループを別々に選択する必要があります。